Installation
Step 1: Module Installation
The Tripal File module is available as a full Drupal module. Therefore, it can be installed following the typical Drupal module installation either via the GUI or via Drush. We’ll do so here using a Drush command:
drush pm-enable tripal_file
If you do not have the module already downloaded and available in the sites/all/modules folder of your Drupal site, then you will be asked if you would like to download and then enable the module.
The module will create two new content types: File and License. It will also create a variety of tables in your Chado database for associating files to base records. Upon installation you should see the following:
$ drush pm-enable tripal_file

The following extensions will be enabled: tripal_file
Do you really want to continue? (y/n): y
INFO (TRIPAL_ENTITIES): Done.
INFO (TRIPAL_ENTITIES): Done.
tripal_file was enabled successfully.                                        [ok]
Custom table, 'file' ,  created successfully.                                [status]
Custom table, 'license' ,  created successfully.                             [status]
Custom table, 'file_contact' ,  created successfully.                        [status]
Custom table, 'fileloc' ,  created successfully.                             [status]
Custom table, 'fileprop' ,  created successfully.                            [status]
Custom table, 'fileloc' , already exists. Table structure not changed, but   [status]
definition array has been saved.
Custom table, 'file_license' ,  created successfully.                        [status]
Custom table, 'analysis_file' ,  created successfully.                       [status]
Custom table, 'assay_file' ,  created successfully.                          [status]
Custom table, 'biomaterial_file' ,  created successfully.                    [status]
Custom table, 'cv_file' ,  created successfully.                             [status]
Custom table, 'eimage_file' ,  created successfully.                         [status]
Custom table, 'feature_file' ,  created successfully.                        [status]
Custom table, 'featuremap_file' ,  created successfully.                     [status]
Custom table, 'library_file' ,  created successfully.                        [status]
Custom table, 'nd_protocol_file' ,  created successfully.                    [status]
Custom table, 'organism_file' ,  created successfully.                       [status]
Custom table, 'phylotree_file' ,  created successfully.                      [status]
Custom table, 'project_file' ,  created successfully.                        [status]
Custom table, 'pub_file' ,  created successfully.                            [status]
Custom table, 'stock_file' ,  created successfully.                          [status]
Custom table, 'stockcollection_file' ,  created successfully.                [status]
Custom table, 'study_file' ,  created successfully.                          [status]
NOTICE: Added the EDAM ontology. Please navigate to Tripal >> Data Loaders >>[status]
Chado Vocabularies >> OBO Vocabulary Loader and submit a job to import the
EDAM vocabulary.
Step 2: Install the EDAM Vocabulary
The EDAM vocabulary is needed for the File module because it provides many of the file types (e.g. FASTA, GFF3, VCF, etc). Any file that is managed by the Tripal File module requires a file type.
The EDAM vocabulary details are automatically added by the Tripal File module, but you will need to install the vocaulary. To do this navigate to the Administration > Tripal > Data Loaders > Chado Vocabularies > OBO Vocabulary Loader page via the administrative menu. Select the EDAM vocabulary from the Ontology OBO File Reference drop down and click the Import OBO File.
Step 3: Set Permissions
Now that the Tripal File module is installed, we must set permissions so that users can view and or create File and License content types. To set permissions, navigate to People page and click the Permissions tab in the top right. Look for permissions that begin with prefix File: and License: and set the according to your needs.
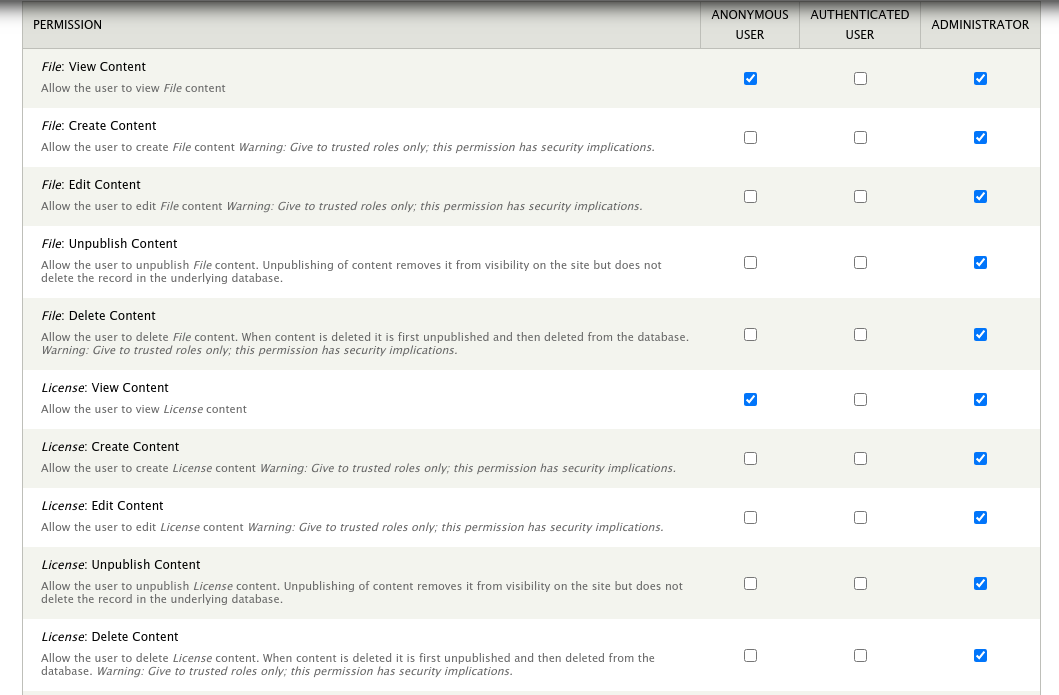
Warning
You should not give the anonymous user any permissions other than ‘view’ permission.